
This session the adventurers returned to the Clacking Caverns on Level 3 of the Scarlet Citadel to confront the undead warlocks encountered last session.
You can read earlier posts here. This post contains spoilers for Scarlet Citadel.
Before returning to the Scarlet Citadel, the characters spend some time putting down roots in Redtower after nearly six months staying at The Cage.
Rather than building a brand new vicarage, Clairmont purchases a house close to the Temple of Khors from its owners for 1,750 gp for himself, Sister Yemeth, and Maya to live in. Tunde sets aside 500 gp for the construction of a new hut in the forest. The hut is to be supported by four giant chicken legs in homage to Baba Yaga. Tricksy opts to remain at The Cage, renting its best room for the next six months for 300 gp.
While the party were in the Clacking Caverns, Tricksy realised Gerhardt’s ring of regeneration wasn’t working. He tries to take it off so Clairmont can examine it but it can’t be removed. He leaves it on his finger for now.
Clairmont casts divination to learn how to defeat the warlock wights in the Clacking Caverns.
Returning to the Scarlet Citadel, the characters enter the dungeon via the owlbear tunnel again and head for the Warlocks’ Tomb, dealing with yet more clacker beetles en route. Before opening the door to the tomb, they check for more glyphs of warding.
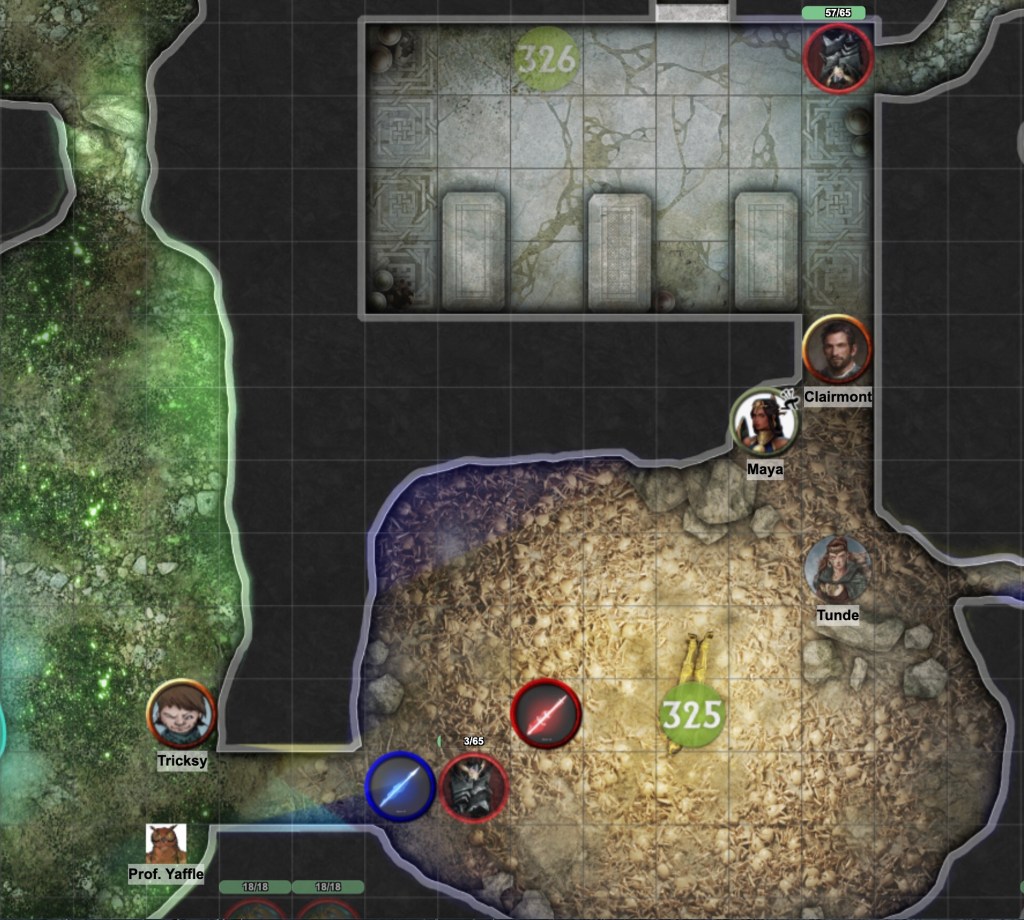
The warlock wights unleash several deadly spells when the party enter, but Clairmont and Maya turn undead, and all three wights are affected. The characters allow two of them to flee and attack the third in the Beetle Husk Chamber, destroying its body, and then its head when this floats up again to attack.

A tense waiting game ensues with the characters readying attacks for when the turned wights return. Both reappear at the same time from different directions, casting shatter, blight, and other powerful spells, and using hellish rebuke when they are attacked.
Maya goes unconscious, then Professor Yaffle makes a heroic sacrifice, distracting one of the wights to allow Tricksy to make a sneak attack. The elf kills the second wight, destroying its head, and drops the last one. Back on her feet, Maya casts dispel magic to stop Tunde turning to stone. Finally Tunde destroys the third head with eldritch blast.
With the undead destroyed, the group withdraws to the tomb marked with a shining sun symbol for a short rest, leaving Tunde’s familiar outside in the guise of a beetle husk.
If you’d like to keep up to date with my Scarlet Citadel campaign and other posts, please do join my mailing list – there’s a sign up form on the home page and subscribers receive a free Parsantium supplement.
If you’ve already signed up and haven’t received a download link, please get in touch.
Main image by David Auden Nash
Discover more from Richard Green | Game Designer
Subscribe to get the latest posts sent to your email.
